Pedestal Group
This area behind the stick contains the radar screen (
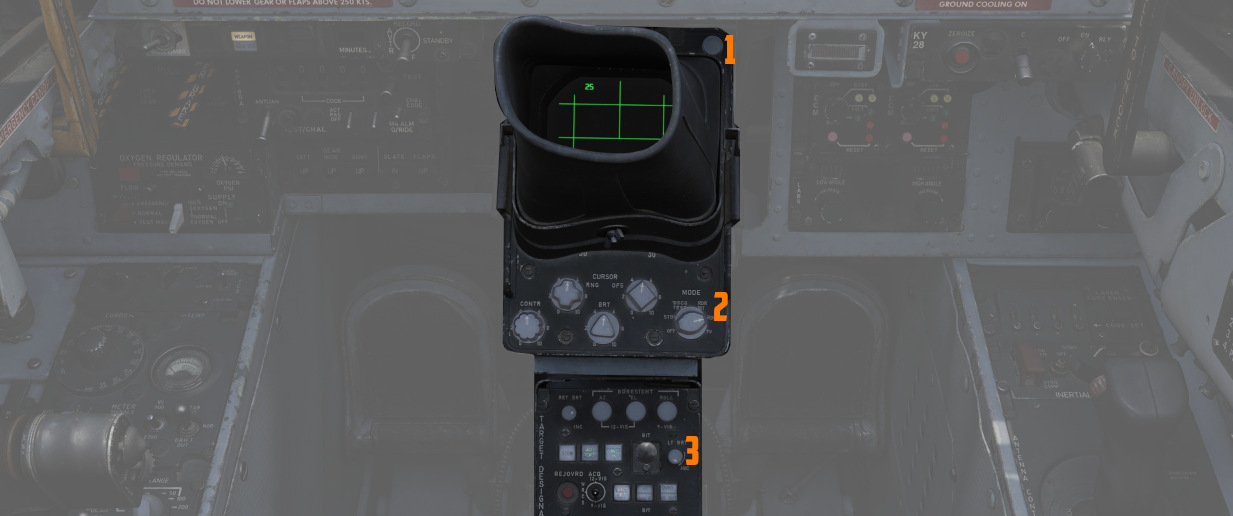
Digital Scan Converter Group (DSCG)
The DSCG displays radar, weapon and targeting pod video footage.
The glare shield cover can be removed by clicking on it.
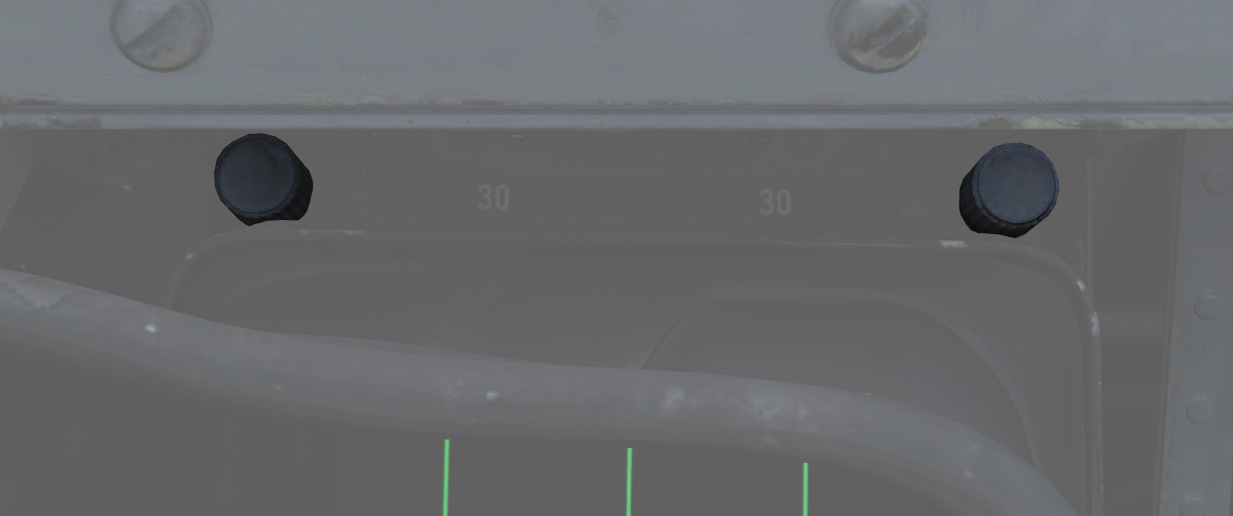
Grid Knob
This knob, located on the top left above the glare shield, controls brightness of the display grid on the visual field of the DSCG display; clockwise increases brightness, counterclockwise decreases.
Scale Knob
Located on the top right, above the glare shield, controls the brightness of the bezel range scales surrounding the DSCG display; clockwise increases brightness, counterclockwise decreases.
H - Home on Jam Lamp
Light inside the top left corner of the glare shield, it illuminates when the radar has achieved angle tracking in Home on Jam mode.
T - Track Lamp
Light inside the top right corner of the glare shield, it illuminates when a standard radar lock-on is achieved. Will go out in the event the radar falls back to memorized range and rate information should the lock be lost.
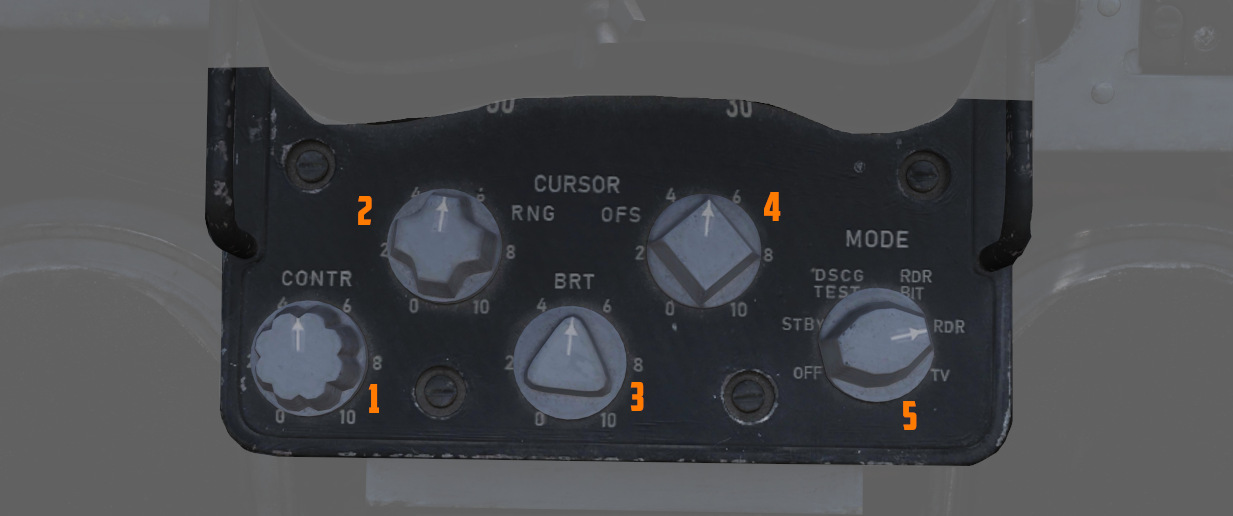
Cursor RNG (Range)
The Cursor RNG knob (
Cursor OFS (Offset)
The Cursor OFS knob (
Contrast Knob - CONTR
The Contrast knob (
Brightness Knob
The Brightness knob (
Mode Knob
The rotary mode knob (
| Name | Description |
|---|---|
| OFF | Turns off DSCG display and de-powers all DSCG components. |
| STBY | Powers DSCG components, DSCG display remains off. Used for takeoff and landing. |
| DSCG TEST | Displays a test search display image with 8 shades of grey to confirm normal operation. Select Range 10 for proper sizing. |
| RDR BIT | Provides BIT sequence test grids for calibration of radar performance. |
| RDR | Used for radar display functionality in all employment modes. |
| TV | Used for TV raster imagery with EO weapons, as well as targeting pods. |
Target Designator Control Set
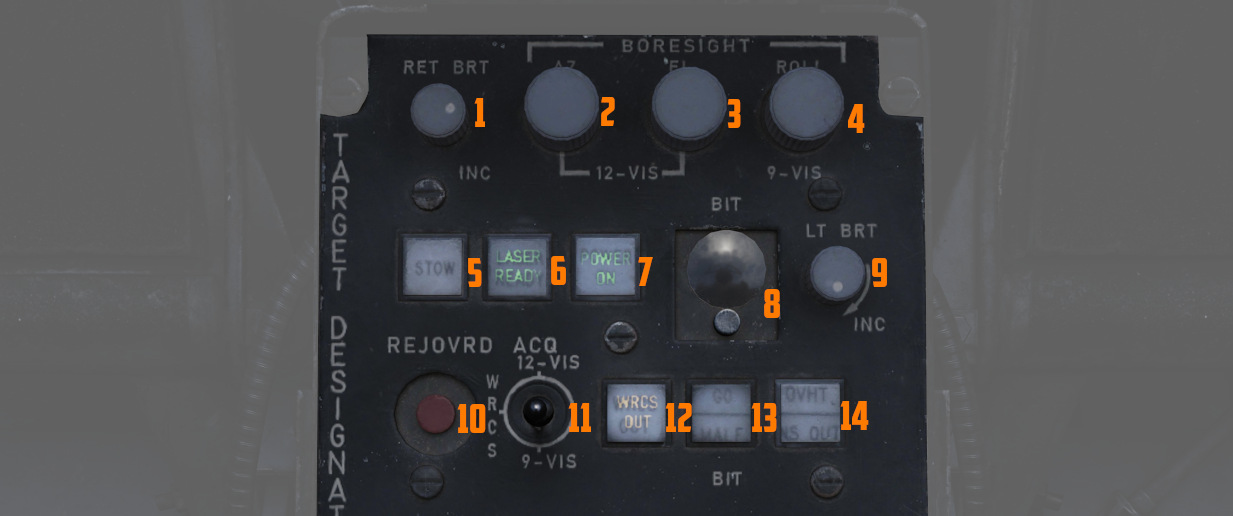
This is the main panel to interact with the Pave Spike Targeting Pod.
Reticle brightness
The knob (
Boresight knobs
Three knobs (2,3 and 4) to control the boresight position of the pod in azimuth, elevation and roll within 2.5 degrees in either direction.
Azimuth and Elevation can best be calibrated in the 12-VIS mode, while roll is best calibrated in 9-VIS.
💡 Normally, the Pod is correctly calibrated by the ground crew before getting into the plane, but can drift due to combat damage or high G maneuvers, in which case a recalibration by the WSO is needed.
See 3.11.5.6. Boresight Procedure for details.
Stow Button
Alternating presses (
When unstowed, the pod will move accordingly to the selected acquisition mode.
To prevent damage to the system, the pod must be stowed during takeoff, landing and any High-G maneuvers.
🟡 CAUTION: The stowed position is held electrically only and without power, the pod swings freely and gets damaged when forcefully bumped into its gimbal limits.
Laser Ready Select Button
Pushing the button (
Light remains off if interlocks (nose gear up and all pod functions working) inhibit use. Subsequent press deactivates the laser system.
Power On Button
Applies (
To prevent damage to the system, whenever equipped, power to the system should be turned on even when the pod is not in use.
BIT Selector Button
Pressed (
BIT 1 is the regular mode of the pod and must be selected for normal operations.
Light Brightness Knob
The rotary knob (
Reject/Override Button
When the pod detects a too huge discrepancy between the laser measured slant range and the INS-based computed ranged, it automatically rejects the former and prefers the latter.
In this case, the button (
Acquisition Mode Selector Switch
Three-position switch (
| Name | Description |
|---|---|
| 12-VIS | Slaves LOS parallel to the optical sight pipper. |
| WRCS | Slaves LOS to the WRCS cursors unless WRCS integration is deactivated; reverts to 12-VIS otherwise. |
| 9-VIS | Slaves LOS to 90 degrees below FRL and rolled 90 degrees left. |
WRCS Out
If lit (
Can be pressed to manually disengage or engage integration, unless it was disintegrated by other means.
BIT Status Indicator
Illuminates (
Overheat Lamp
The OVHT lamp illuminates (14, upper half) to indicate an overheat condition in the pod.
To prevent damage, turn off the pod and give it some time to cool before further use. Ignoring the lamp will cause parts of the pod to melt, damaging it irreparably.
To prolong the use of the pod and prevent overheating, limit slow and low-level flight, as well as continuous use of the laser. As a rule of thumb, do not use the laser for longer than 15 minutes without allowing for cooling between uses. Limit continued slow and low-level flight while operating the pod to 30 minutes. For extreme outside temperatures, adjust the limits accordingly.
INS Out
If lit (14, lower half), the INS is not integrated into the pod and functionalities requiring its integration are not available.
Can be pressed to manually disengage or engage integration, unless it was disintegrated by other means.
Rudder Pedal Adjustment Crank
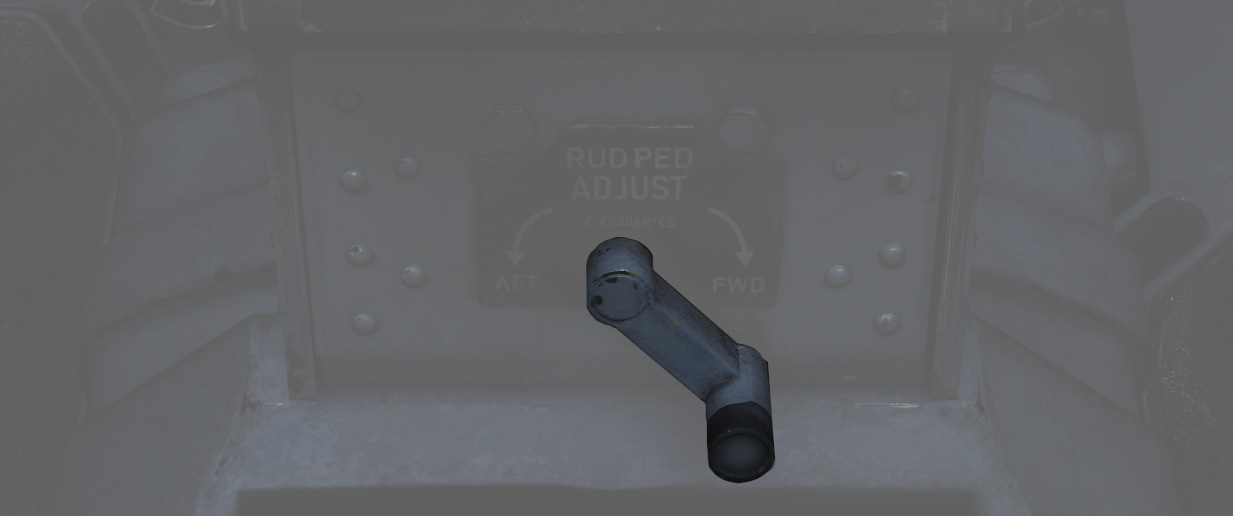
Used to adjust the ergonomic position of the rudder pedals forward or back from the WSO.
Requires 12 full turns to move the pedals across the entire range.